| Lets
begin!!
Step
One:
- once
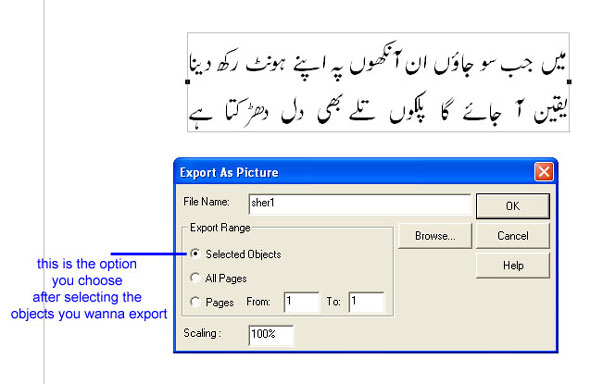
you have inpage make sure you type your text in a TEXT BOX.
- after
you have typed a poem or whatever, click on it to select it with
the POINTER.
- once
its selected go to file-export page. a new window will pop
up.
- click
on BROWSE and choose where you wanna save the image. type in the
name of the image and click save. it will take you back to the little
window with the BROWSE button on it.
- now look
under EXPORT RANGE where it says how you want the image saved. since
we have selected the text box we want the option that says SELECTED
OBJECT.
- click
on ok and you image will be saved as a GIF file.
Step
Two:
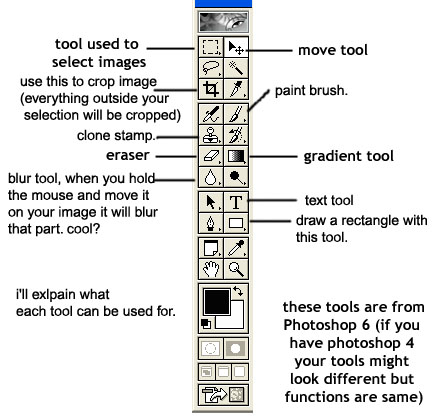
Learn tools that you'll be using in photoshop!
here are
the tools you'll be using in photoshop!
alrighty
now those who have never worked with photoshop before!
you have learned the tools from the above image but now i wanna talk a little
about layers.
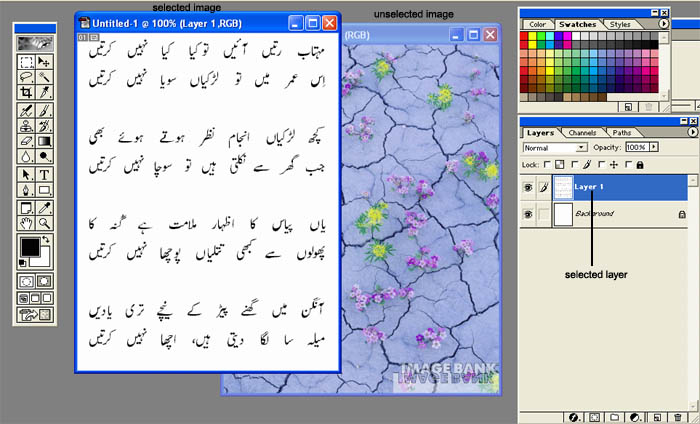
an advantage of creating
and working with layers is that you can move around the objects in
different layers. you can also move around the text you type in a
layer and a layer can easily be deleted if you don't like the way
things came out.
another thing i like about layers is
sometimes you don't wanna change the look of the whole image. and
mostly if you are working with lots of objects in one canvas its a
lot easier to work in one layer on ONE object at a time. and again
the emphasiz is that you can delete and move around the layers.
now then
here is a screen shot of the layers palette.
Step
Three:
find an image you wanna
layer on top of your urdu text image.
now
in photoshop open the urdu text image AND your other image you wanna
layer on top of your urdu image.
click on the image to
see the bigger version
NOTE: sometimes
in photoshop you can't work with layers if you have a GIF exported
from inpage. just SELECT the image with the selecter  and go to top
menu edit and copy. then from top menu FILE click new and paste the
urdu text image onto the new canvas. and go to top
menu edit and copy. then from top menu FILE click new and paste the
urdu text image onto the new canvas.
STEP
FOUR:
- now that you have both of your images
open. and you have pasted the urdu text image in a new canvas. go
to the bottom right of the layers palette and click on ADD NEW LAYER.
then with the selecter select the background
image, copy it and paste it on top of your urdu image.
- it is now covering your urdu image
and you can't see the urdu text.
- now make sure which image is ACTIVE.
(refer to the top image to see the difference between ACTIVE and
INACTIVE image)
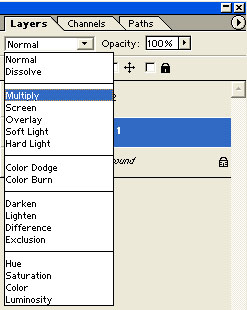
- now go to the layer options and choose
the option MULTIPLY. you'll notice now the text appears on
top of your background image. but its hard to see the text because
your background image is dark.
 ................ ................
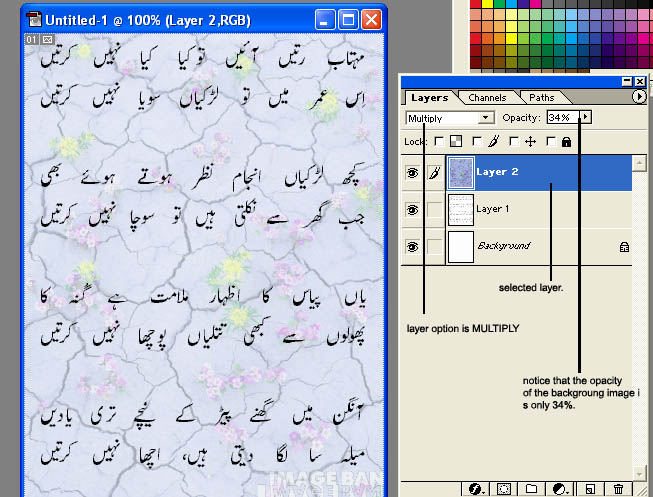
- right next to the layer options
you'll see the words OPACITY
![]() .
click on the100% next to it and change the OPACITY from 100% to
60% or 50% depending on how dark your image is. .
click on the100% next to it and change the OPACITY from 100% to
60% or 50% depending on how dark your image is.
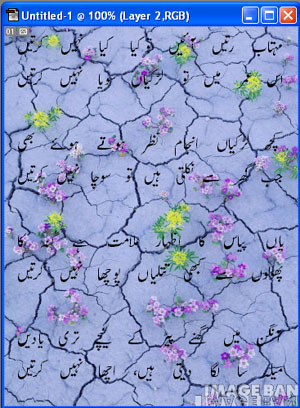
this is the end product:
NOW if for some reason your image didn't
come out like mine, plz email me and we'll try to figure out whats
wrong together.
|